Battle for Gilneas
The goal of this battleground is to be the first team to obtain 2000 resources. Gathering resources is achieved by capturing and controlling the Mine, the Lighthouse and the Waterworks. Horde and Alliance players begin each Battle for Gilneas on opposite sides of the battlefield.
Strategy/ Overview
There are two different strategies to this style map. The easiest and more basic strategy is the 2-3-5 offensive/defensive. The other is the 2-4-4 strategy.
Each player will be described as follows:
Main Assist – These players are ideally an Arms Warrior, Hunter or Death Knight. The idea is that the DPS can work with whoever is the main assist in their combat group, allowing for focused damage. The mortal wounds debuff will make it harder to keep the targeted enemies alive.
Healer – These are classes that will not do much besides healing. If you are going to put 2 healers in a combat group, try to distribute them to create some synergy.
Off Healer – This is a class that could heal if the fight begins to go poorly, such as non-resto Shaman, Shadow Priests, Balance Druids or Retribution Paladins. An off healers responsibility is to make sure the healer stays alive. Thus, if a teams Holy Priest is under attack, an Retribution Paladin/Balance Druid should try to keep him alive.
DPS – A DPS class kills things. It would be advisable to have an assist macro for their teams main assist. Like healing, creating group unity whenever it is possible.
Ninja – Classes that can stealth can be grouped together to strategically attack or cap locations. A ninja team would ideally be able to quickly surprise and kill/cap a location if it is under guarded. Rogues and Feral Druids are ideal, but Mages can be used as well, thanks to invisibility. If there are extra healers, a Resto Druid could be used in this position to provide some crowd control.
The Two Strategies
2-3-5 Offensive, Defensive
Out of the three bases in Battle for Gilneas, each team has one base that is their "home base" .For the Alliance, it would be the Lighthouse, while the Hordes home base is the Mines. These bases are where the faction begins each match, and where they resurrect when their team doesn't control any of the bases.
Teams should be divided up something like this:
|
Group 1:
Defense Healer |
Group 2:
DPS/Off Healer DPS DPS |
Group 3:
Healer Healer DPS/Off Healer DPS DPS |
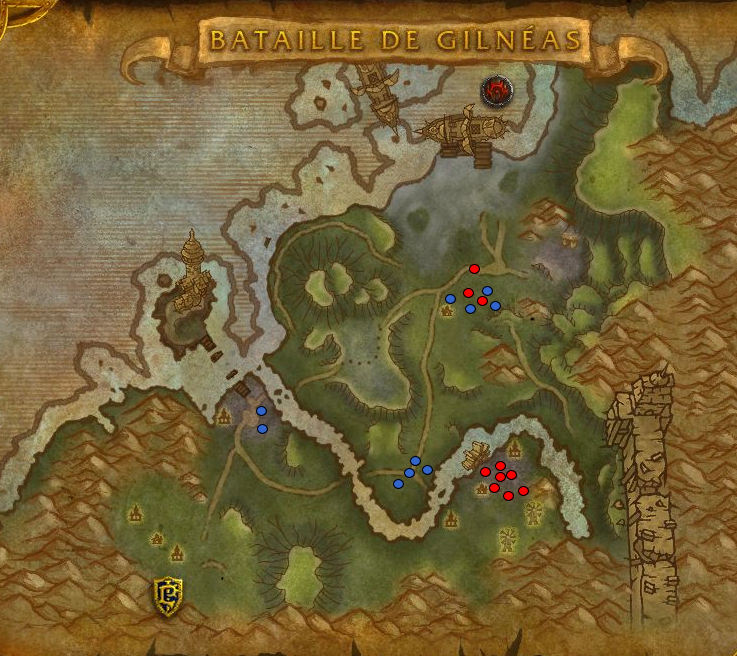
The first few seconds should look like this:

Early Game
Immediately send Group 1 to capture the Lighthouse and stay to defend it. Preferably the DPS will be a player with a pet so that the pet can be placed near the flag while the player stands back or to the side. This helps to prevent enemies crowd controlling both the player and the pet. If either the player or the pet is CC'd then one may still be able to interrupt the enemy if they attempt to cap.
Groups 2 and 3 will run to Waterworks. Group 2 can attempt to stop or slow the enemy players running towards the base. This should be done as close to the base as possible without actually reaching the base. Attempt to anticipate where the enemy team will be coming from. The Horde will typically run as a group across the water. Frost Novas, Traps, etc can be used to stop or slow large groups of players. This could give your team a chance to capture the base before the enemy reaches it. Group 3 should continue straight to the base to cap it.
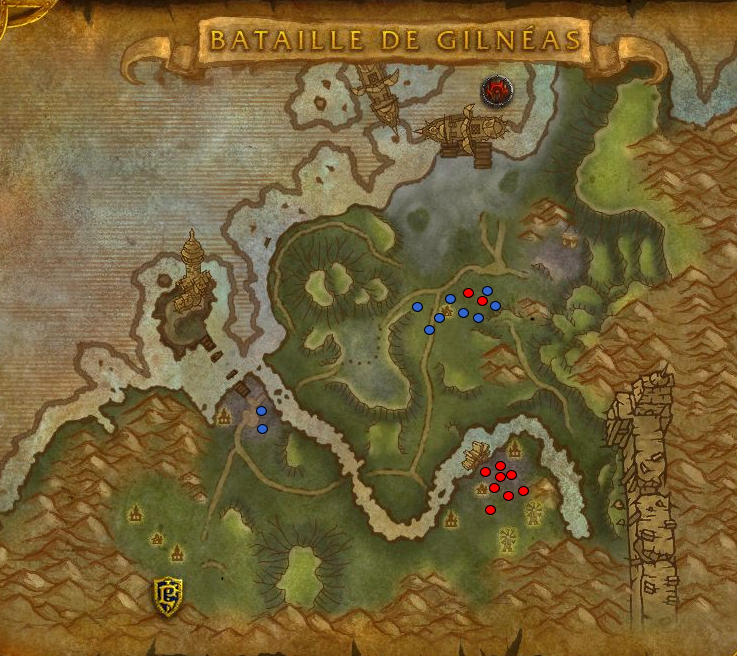
Mid / End Game
Once you hold the two bases, Group 2's role will typically be support. Your job will be running back and forth from Lighthouse to Water Works killing all the horde that you see and reacting to what your teammates tell you.
Immediately send Group 1 to capture the Lighthouse and stay to defend it. Preferably the DPS will be a player with a pet so that the pet can be placed near the flag while the player stands back or to the side. This helps to prevent enemies crowd controlling both the player and the pet. If either the player or the pet is CC'd then one may still be able to interrupt the enemy if they attempt to cap.
Groups 2 and 3 will run to Waterworks. Group 2 can attempt to stop or slow the enemy players running towards the base. This should be done as close to the base as possible without actually reaching the base. Attempt to anticipate where the enemy team will be coming from. The Horde will typically run as a group across the water. Frost Novas, Traps, etc can be used to stop or slow large groups of players. This could give your team a chance to capture the base before the enemy reaches it. Group 3 should continue straight to the base to cap it.
Mid / End Game
Once you hold the two bases, Group 2's role will typically be support. Your job will be running back and forth from Lighthouse to Water Works killing all the horde that you see and reacting to what your teammates tell you.
When Things Go Wrong!
1 - The enemy team reaches the base before you, and has a chance to capture it
Players must do their best to prevent the enemy from capturing the base. Aoe near the flag as much as possible and single target any obvious cappers. Crowd control should also be used on cooldown. Every player should take advantage of their crowd controls, silences, and traps. If there is a possibility of capping, players can attempt to do so. However, if you are constantly being interrupted, wait for the area to be cleared out before attempting to capture the base. Do whatever it takes to keep the enemy from taking the base.
2 - Group 1 are in need of assistance at Lighthouse but we are fighting for WW
Send however many additional players are needed. It is important that you at least hold on to your original base.
3 - The enemy team captures the Waterworks and your team is only controlling one base
You must try your hardest to capture a second base. Even after a lot of time has elapsed in which your team is losing, you still have a chance to win if you capture a second base. You can simply attempt to keep attacking one particular base, or you can send the majority of your team to one base and two stealthed players to the other in the hopes of getting one of them. If the enemy sees no threat of incoming and your team is battling at another base, they may only leave one or two players at the one base to defend.
4 - There is one enemy defending a base
Send two stealthed players. One can keep him occupied while the other captures the base.
5 - There are two enemies defending a base
CC one enemy while you both kill the other then there is just one left for you to kill which one player can do while the other takes the base. This must be done quickly before backup has a chance to arrive.
The 2-4-4 Strategy
For this strategy your teams should look like this:
|
Group 1:
Defense Healer |
Group 2:
DPS DPS DPS/Off Healer Healer |
Group 3:
DPS DPS DPS/Off Healer Healer |
Early Game
Send Group 1 to the Lighthouse to capture the base and defend it. Group 2 and 3 will travel straight across and go to Mines. Likely, there will only be one or two enemy players defending that base, their "home" node. Typically, most players run to capture Waterworks so, on most occasions, you can expect the majority of enemy players to head to Waterworks regardless of what team you are on.
At this point it should look like this:
Mid / End Game
Once both of these bases are captured by your team, ensure that both are defended and the Group 2 reinforcements are distributed as needed. Do not attempt to capture the third base unless you have secured the other two.
There is quite a bit of a distance between the Mines and Lighthouse so Group 2 should stay at the crossroads between the two bases. This way they will be able to quickly get to either base if incoming calls are made.